
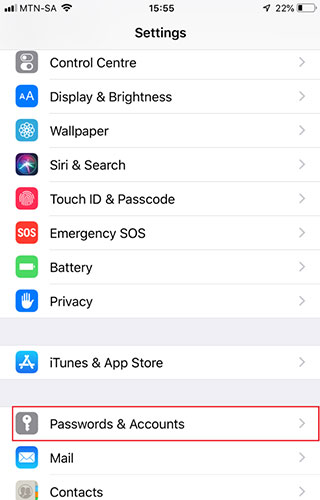
STEP 1
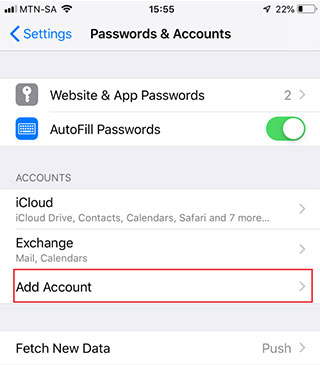
STEP 2
This screen will display a list of the email accounts that are set up on your iPhone. Select “Add Account” to start setting up your new or additional email account.
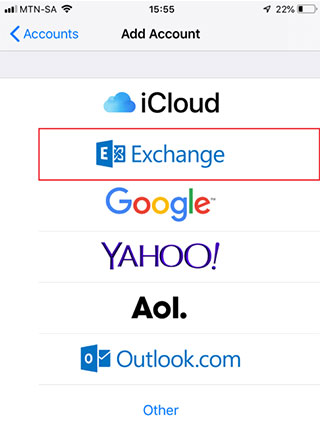
STEP 3
Here you will see a list of email account types, ranging from iCloud to Outlook. Select “Exchange” to begin with the account setup.
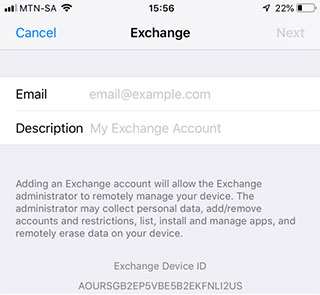
STEP 4
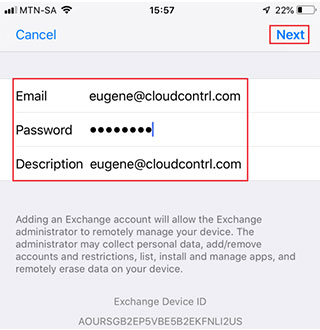
Enter your email address in the first textbox provided. The “Description” textbox can be used to name your email account so that differentiating between multiple accounts is easier. After entering these details, select “Next.” You will be presented with a pop-up box; select “Configure Manually” to continue.
STEP 5
Enter your email account’s password and click “Next.” Your iPhone will start verifying the mail account that has been added, and another pop-up box will display. Select “Continue” on the pop-up box.
STEP 6
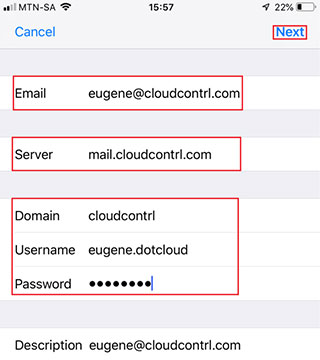
On the next screen, you will need to enter all the required server settings: Email, Server, Domain, Username and Password. These details should be supplied to you by your hosting provider.
STEP 7
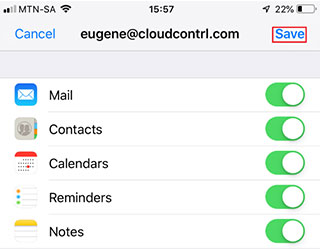
Lastly, enable all the desired sync options presented to you on your screen. Click “Save” to confirm the settings, where after you can open your Mail application and wait for your email to sync. Done!
STEP 1
STEP 2
This screen will display a list of the email accounts that are set up on your iPhone. Select “Add Account” to start setting up your new or additional email account.
STEP 3
Here you will see a list of email account types, ranging from iCloud to Outlook. Select “Exchange” to begin with the account setup.
STEP 4
Enter your email address in the first textbox provided. The “Description” textbox can be used to name your email account so that differentiating between multiple accounts is easier. After entering these details, select “Next.” You will be presented with a pop-up box; select “Configure Manually” to continue.
STEP 5
Enter your email account’s password and click “Next.” Your iPhone will start verifying the mail account that has been added, and another pop-up box will display. Select “Continue” on the pop-up box.
STEP 6
On the next screen, you will need to enter all the required server settings: Email, Server, Domain, Username and Password. These details should be supplied to you by your hosting provider.
STEP 7
Lastly, enable all the desired sync options presented to you on your screen. Click “Save” to confirm the settings, where after you can open your Mail application and wait for your email to sync. Done!

Recent Comments